在Ubuntu上安装v2ray和smartdns,并在客户端使用proxy上网

Contents
在树莓派上使用Dockers运行Openwrt并作为主路由器的旁路由的方式比较爽,但是树莓派的风扇声音太大,考虑直接用电脑代替树莓派。在Ubuntu Server上安装V2Ray客户端+smartdns,客户端则使用proxy进行上网。
本文假设你已经安装了Ubuntu Server了
v2ray安装
v2ray安装比较简单,直接去github上找一个版本下载即可
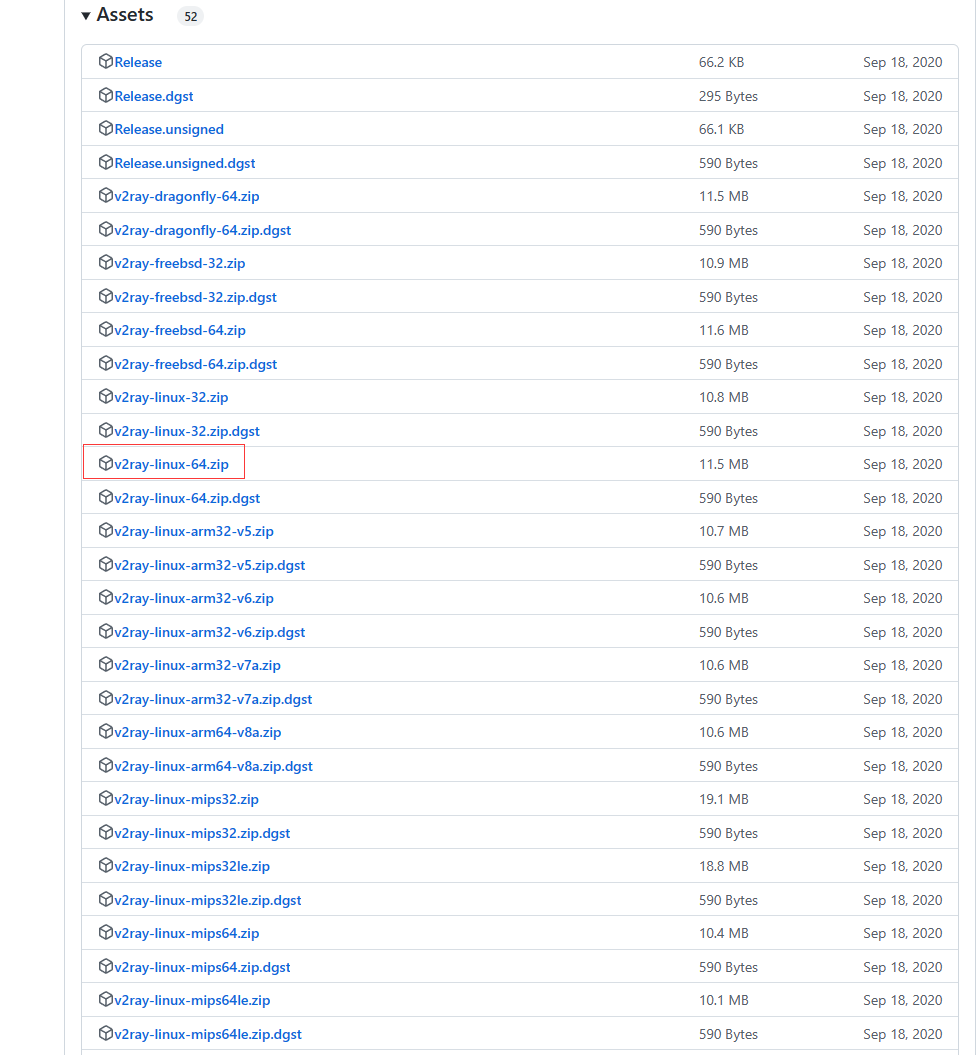 然后将下载的文件scp到服务器并解压到一个目录中,假设解压的目录为
/usr/local/bin/v2ray。
编辑配置文件
配置文件的路径为解压目录中的config.json
|
|
我使用的配置文件如下:注意:需要outbounds,根据server来配置
|
|
tips:
v2ray-rules-dat可以在这个仓库下载
编辑systemd文件
systemd文件路径为:/etc/systemd/system/v2ray.service
systemd文件内容为:
|
|
如果自己解压的目录不一致,则需要替换ExecStart部分
启动v2ray
|
|
smartdns
官网介绍的是:
SmartDNS 是一个运行在本地的 DNS 服务器,它接受来自本地客户端的 DNS 查询请求,然后从多个上游 DNS 服务器获取 DNS 查询结果,并将访问速度最快的结果返回给客户端,以此提高网络访问速度。 SmartDNS 同时支持指定特定域名 IP 地址,并高性匹配,可达到过滤广告的效果; 支持DOT(DNS over TLS)和DOH(DNS over HTTPS),更好的保护隐私。 与 DNSmasq 的 all-servers 不同,SmartDNS 返回的是访问速度最快的解析结果。
我使用了1年多,稳定、好用,就是解析Binance的时候经常出问题。
安装
安装比较简单,Ubuntu上直接使用
|
|
其他系统可以参考smart官网介绍。
配置
smartdns默认的配置文件路径为:/etc/smartdns/smartdns.conf,需要修改的地方包括:
- 添加53端口的监听
|
|
- 添加一些dns服务器
|
|
启动
默认情况下,系统的53端口被systemd-resolved占用,启动smartdns则需要先停止systemd-resolved
|
|
然后启动smartdns
|
|
配置代理访问
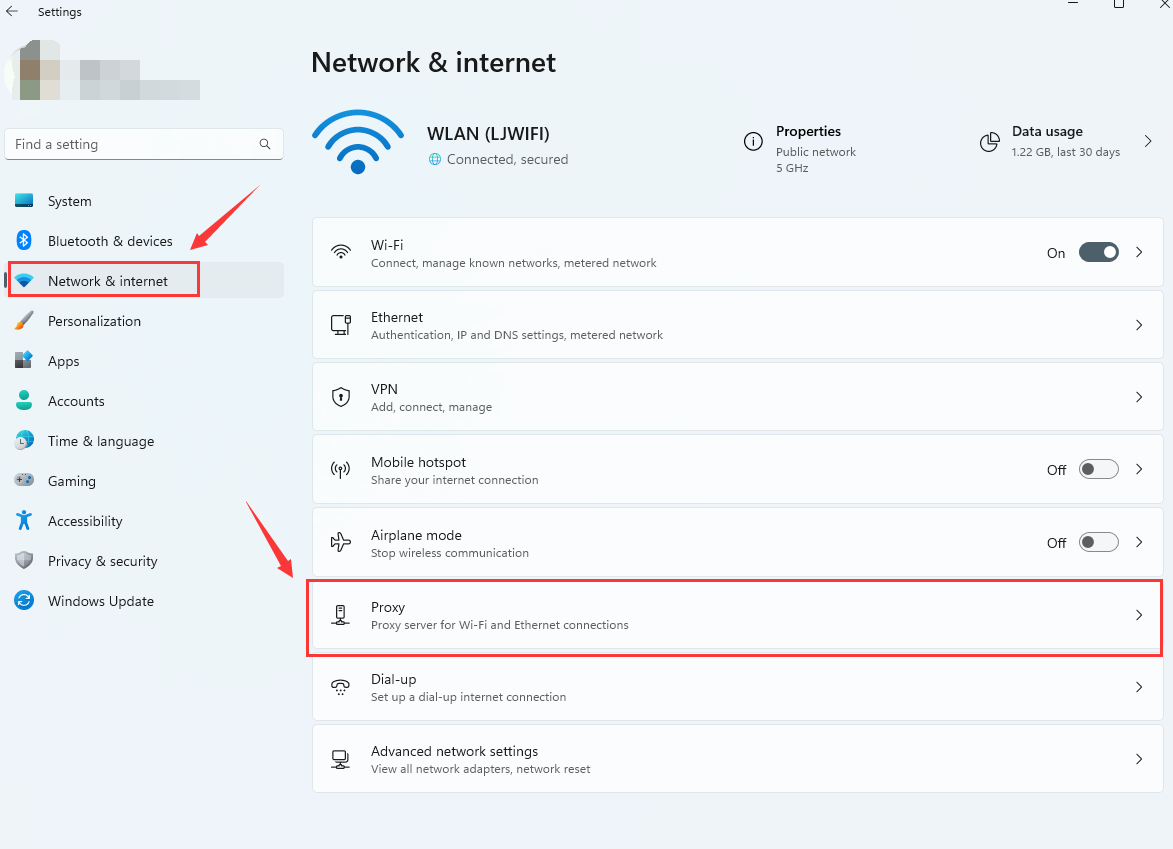
windows11可以配置系统代理
- 首先在设置里找到网络中的代理配置
- 手动配置
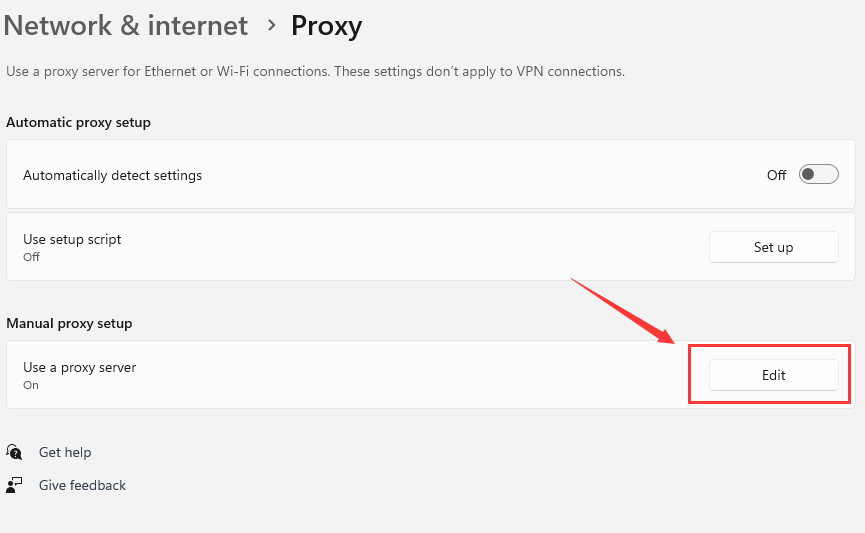
- 编辑配置
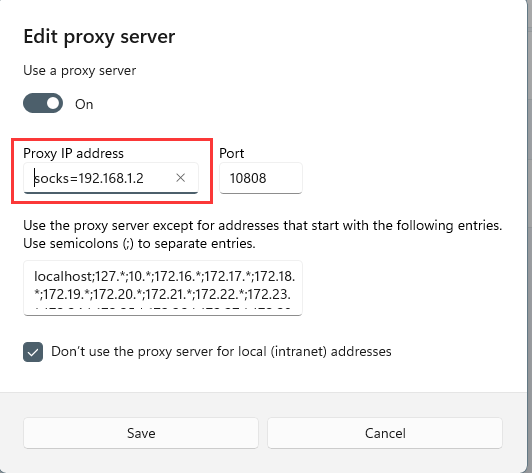 注意:proxy的ip可以配置为socks={proxy ip},声明使用socks代理
然后就可以在浏览器中访问对应的网页了
Author hlday
LastMod 2022-12-21